There are few things that need to be done from your side for launch, prelaunch, and update of the app.
Checklist
- Playstore access to tech email (Admin Access until Tradly deploy the first time uploading & It could be changed to developer afterwards)
- Keystore config to be updated in superadmin (Native Integrations > Playstore)
- App Name (SuperAdmin > App Customisation)
- App primary color (SuperAdmin > App Customisation”)
- App Secondary color (if you want to have gradiant look)
- Google json to be uploaded (SuperAdmin > App Customisation)
- Splash icon (SuperAdmin > App Customisation)
- Android icons Zip file (SuperAdmin > App Customisation)
- Notification icon (SuperAdmin > Native Integrations > Playstore)
- Branch details (key, domain link) (SuperAdmin > Native Integrations > Branch)
Keystore Config
When publishing an app to Google Play, we should also opt in to Play App Signing. We need three information
- first name | last name: ____
- organisation name: __ As per Google https://developer.android.com/studio/publish/app-signing#sign-apk
Prelaunch
- Create App
- Store Listing information
- App Content
Video: App content setup
Create App
Fill in all the information on the play store create app section
- Name
- Language
- Store settings (App)
- Free
- Declarations (Tick both Program policies, US export laws )
Store Listing information
- Name
- App information
- App screenshots
- App icon
- Featured image
Pricing Distributions
- Select FREE if your app is free.
- Input the countries your app needs to be published and shown. If you have selected the US as the available countries, any play store users who have not registered under the US country will not be eligible to download this app.
App Content
- Privacy Policy URL (Privacy URL of your business hosted on your website. A simple HTML would be enough)
- App Access
- As your apps have login functionality that needs users to like an item, follow the store, buy items, etc. We need to provide one access for Google to test this functionality to see whether everything looks legally okay for users.
- Ads: If your product is going to have ads inside the app, you need to explicitly mention them to the users.
- Target Audience
- Select here the appropriate age group your app is targeted. The objective for google is to make sure your app doesn’t go to children or other age groups if they are not planned to be. So they require this informations upfront.
- Content Rating After or before providing the AAB, you need to do this step. As per Google, it will be used to Your rating will be used to:
- Inform consumers about the age appropriateness of your app.
- Block or filter your content in certain territories or to specific users where legally required.
- Evaluate your app’s eligibility for special developer programs.
On launch
- App Signing
- App AAB file upload (TradlyPlatform team will send this)
App Signing
Follow the steps to prepare & roll out your release to create a new release: https://support.google.com/googleplay/android-developer/answer/9859348?visit_id=637480240879917296-738086813&rd=1
:::important After you choose a release track, configure app signing under the “Let Google create and manage my app signing” :::
the key section as follows: To have Google Play generate an app signing key for you and use it to sign your app, select Continue. The key you use to sign your first release becomes your upload key, and you should use it to sign future releases.
Refer more: https://developer.android.com/studio/publish/app-signing#enroll
App Updates
- Every time we give an AAB file, you can go ahead and upload the file in PRODUCTION RELEASE management (sometimes if time permits, we can directly upload that for you)
- It will be straightforward adding a release name and providing a short brief on what’s this update has
OFFICIAL RESOURCES https://support.google.com/googleplay/android-developer/answer/9859152?hl=en
:::warning Other Notes Whenever you receive an email or see an app console with any warnings about app updates, read the information carefully. If you are not sure ask us. :::
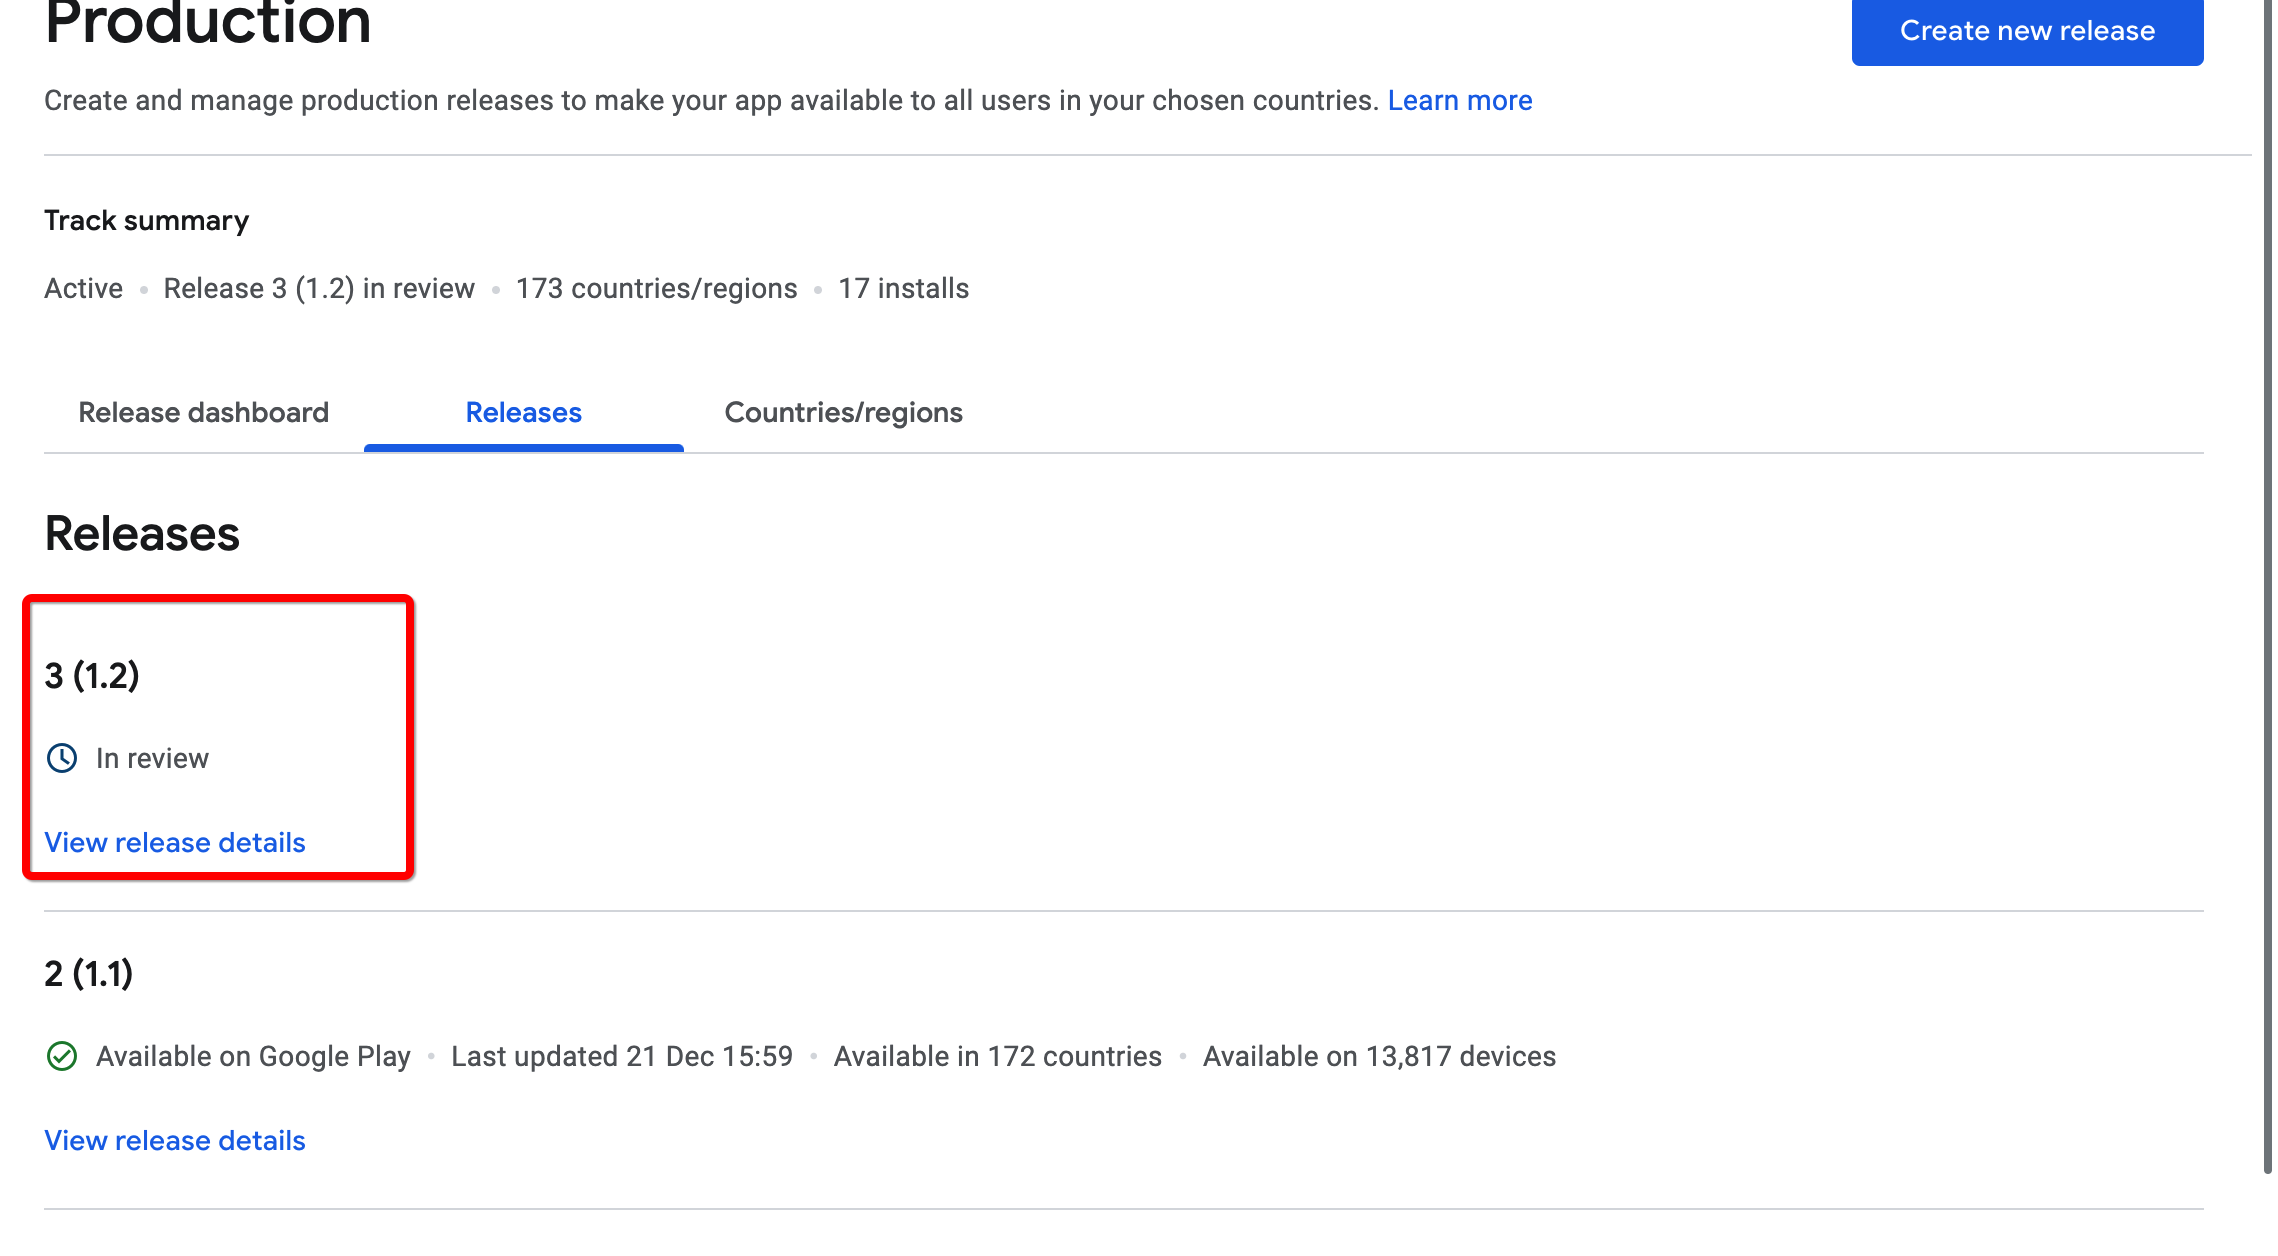
On Update
Visit your play store https://play.google.com/console/ and do the following steps to update your apps
Video: Updating apps
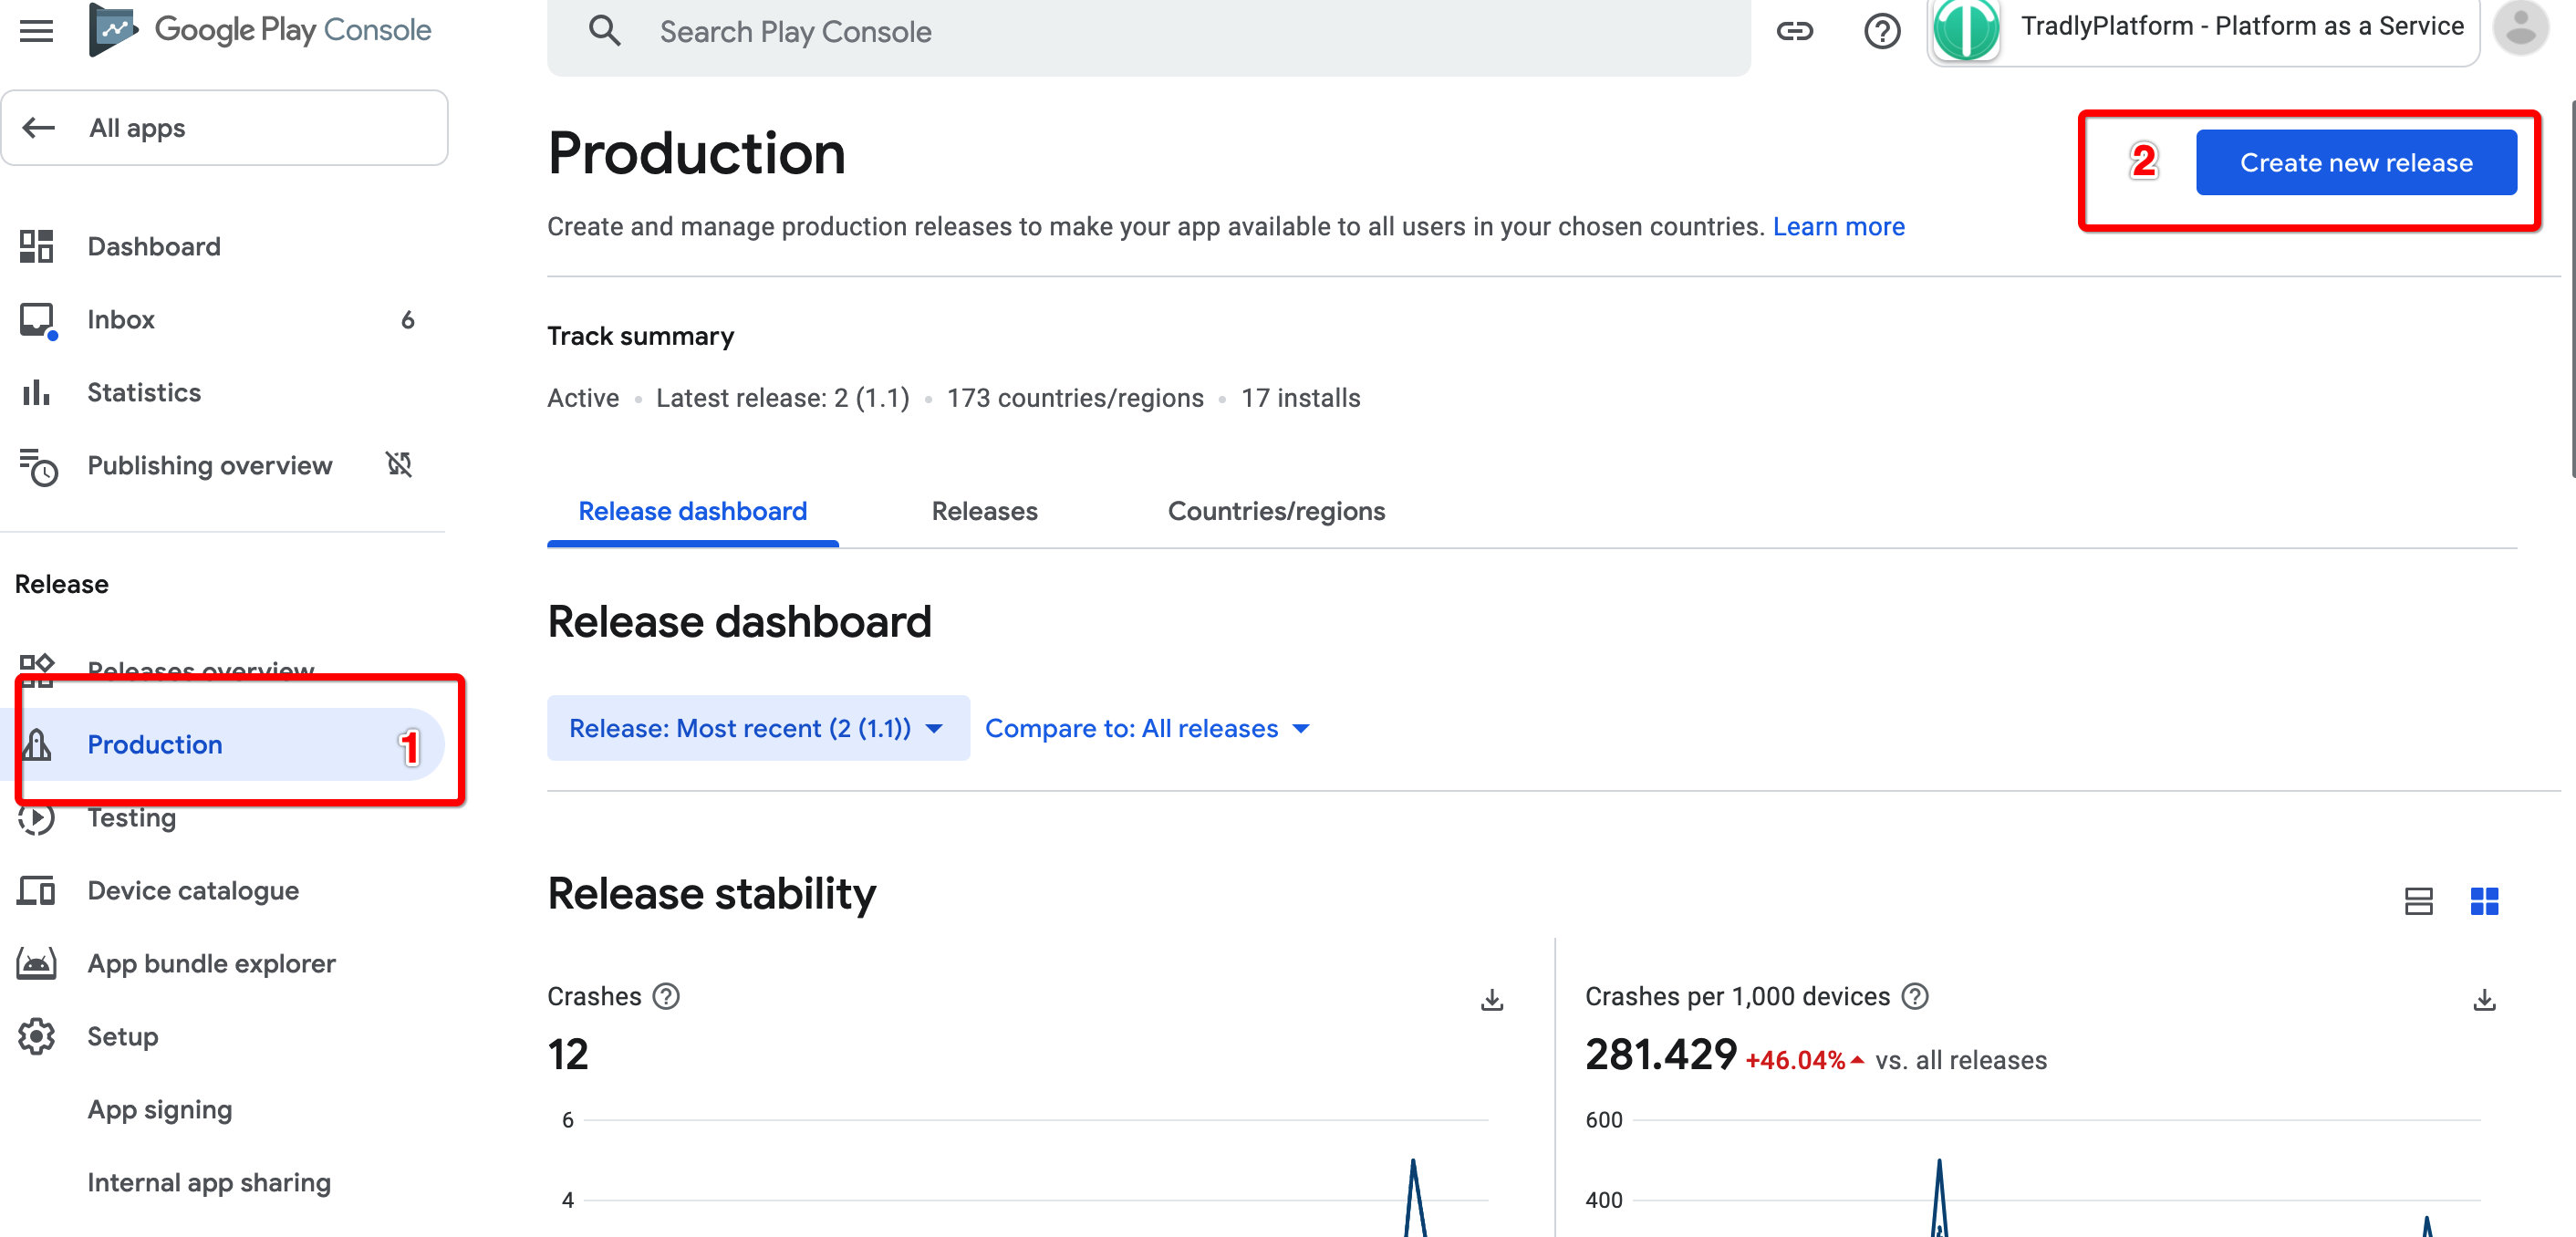
1. Go to Production
2. Create Release
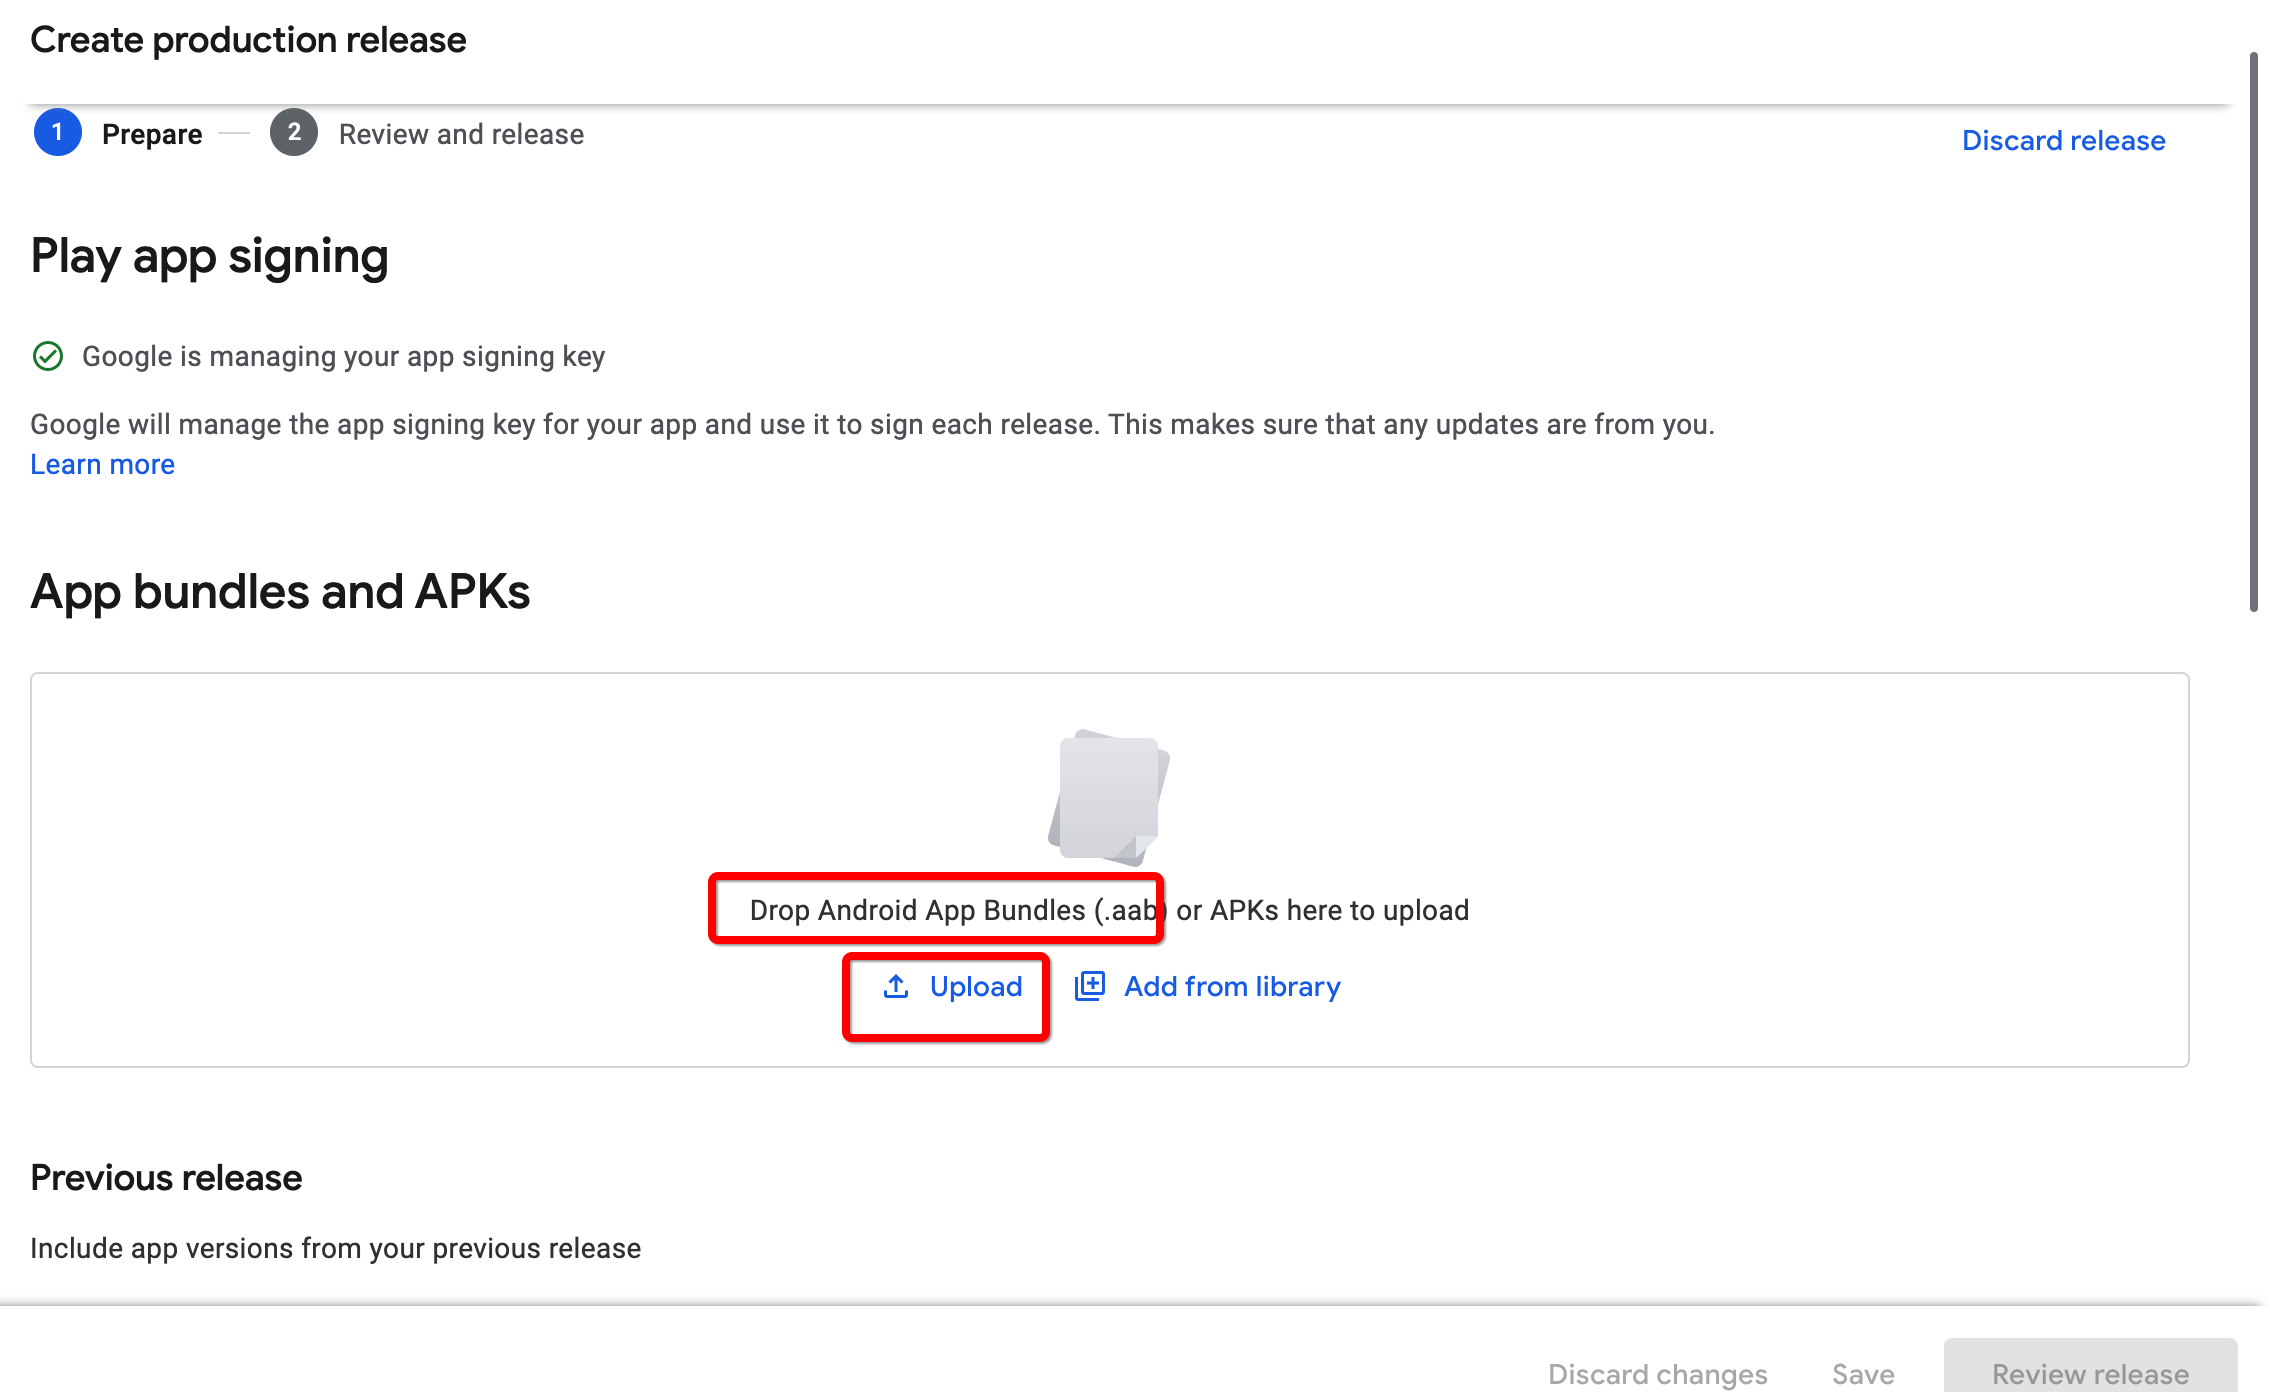
3. Upload the AAB
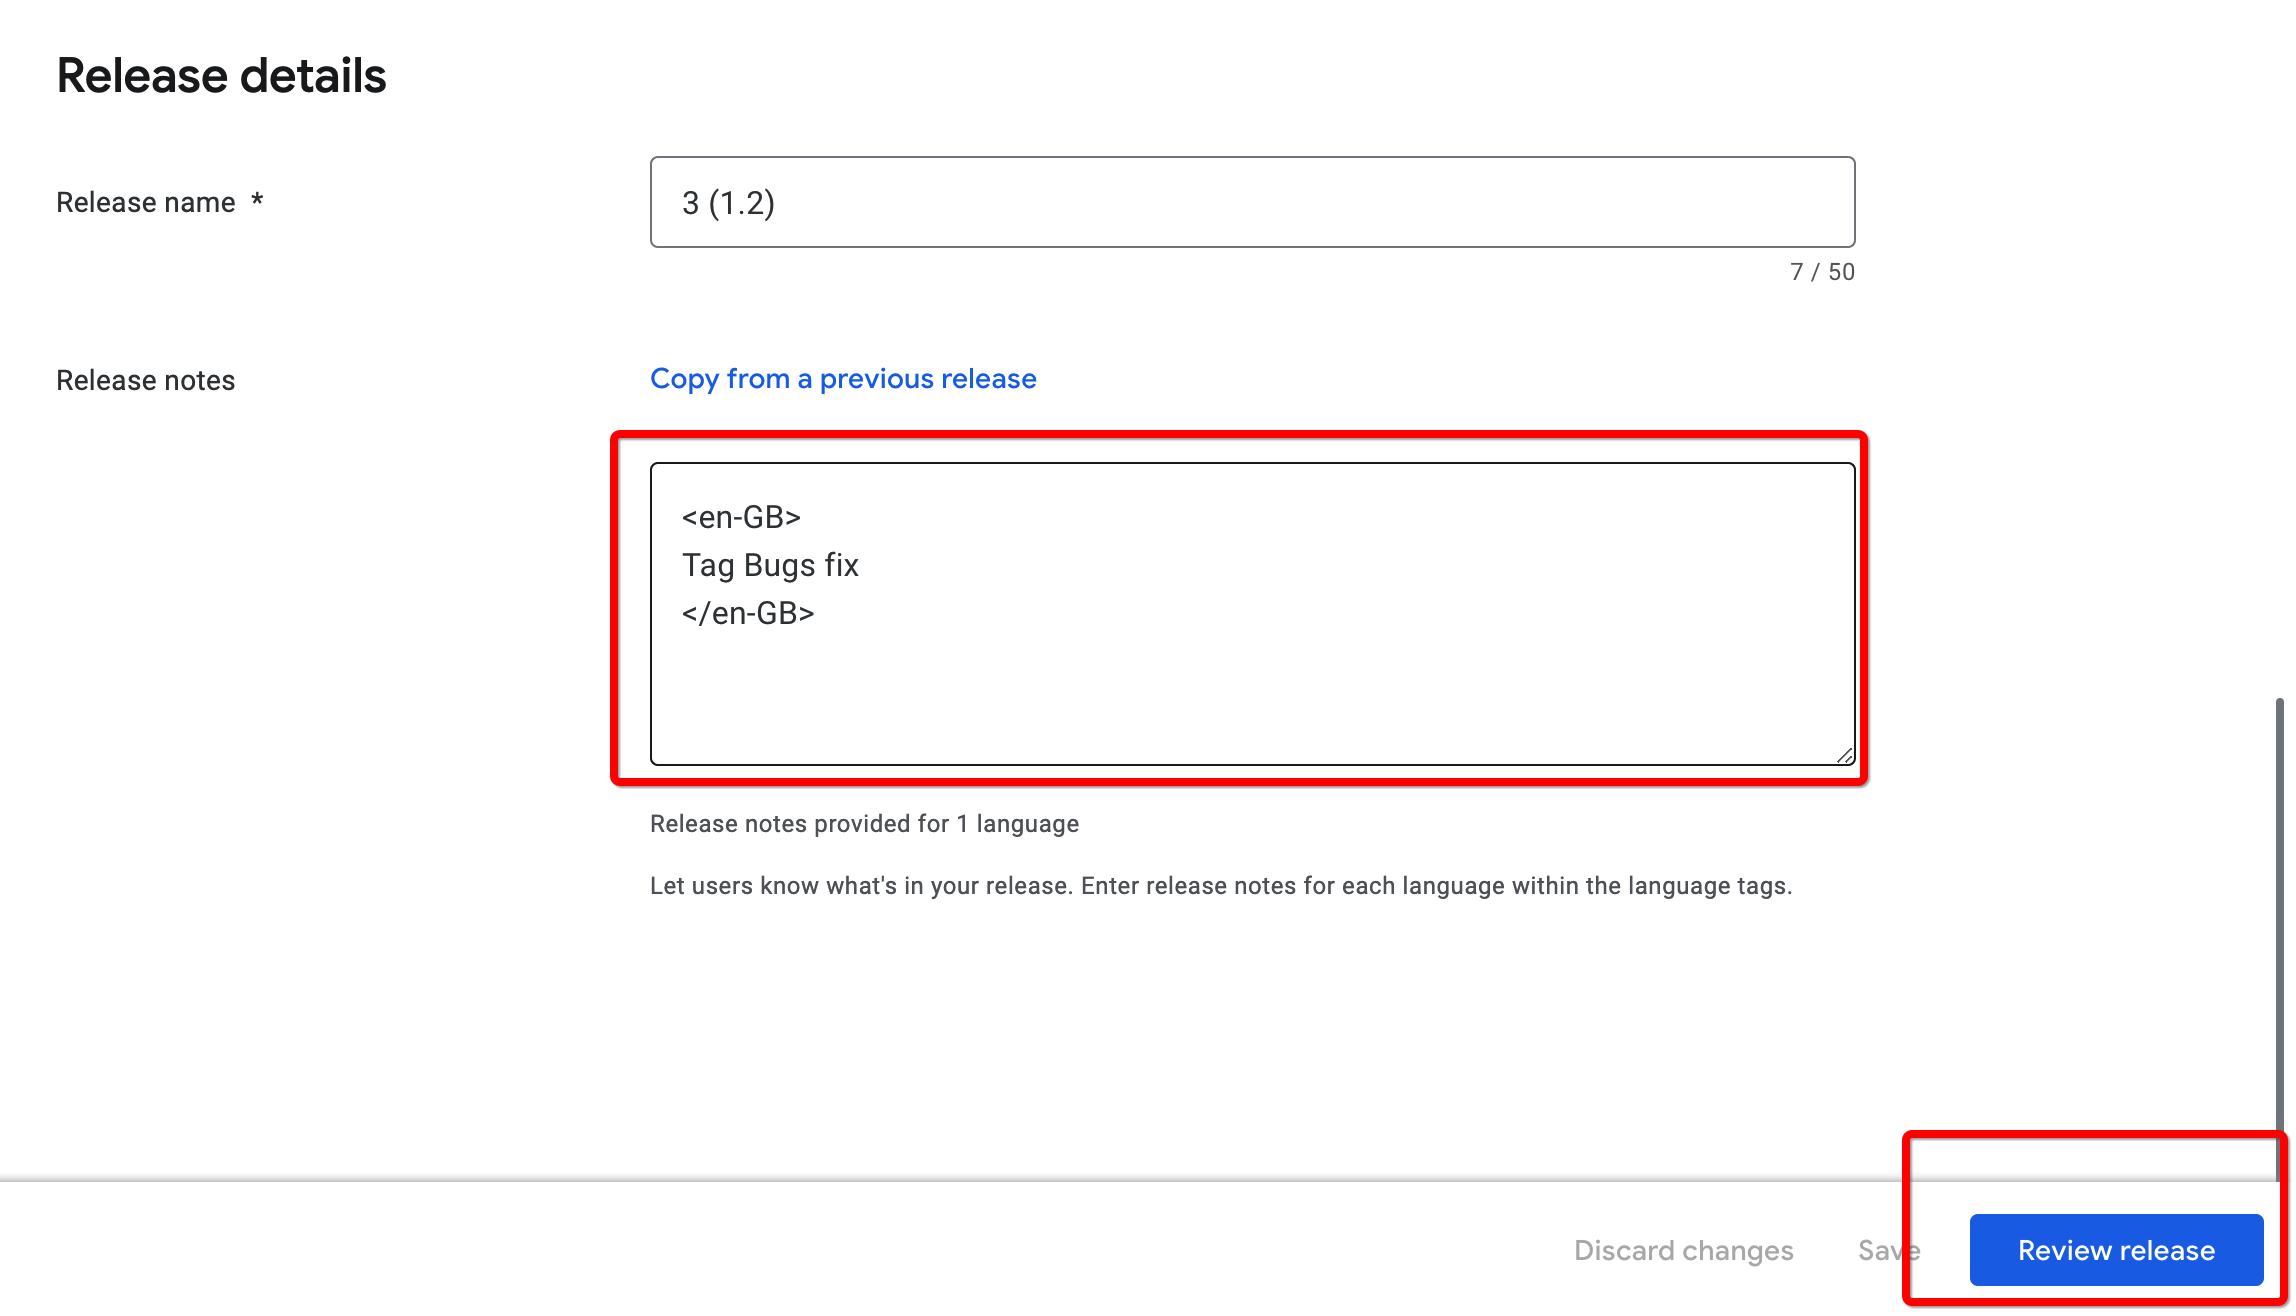
4. Add short information on what has been updated
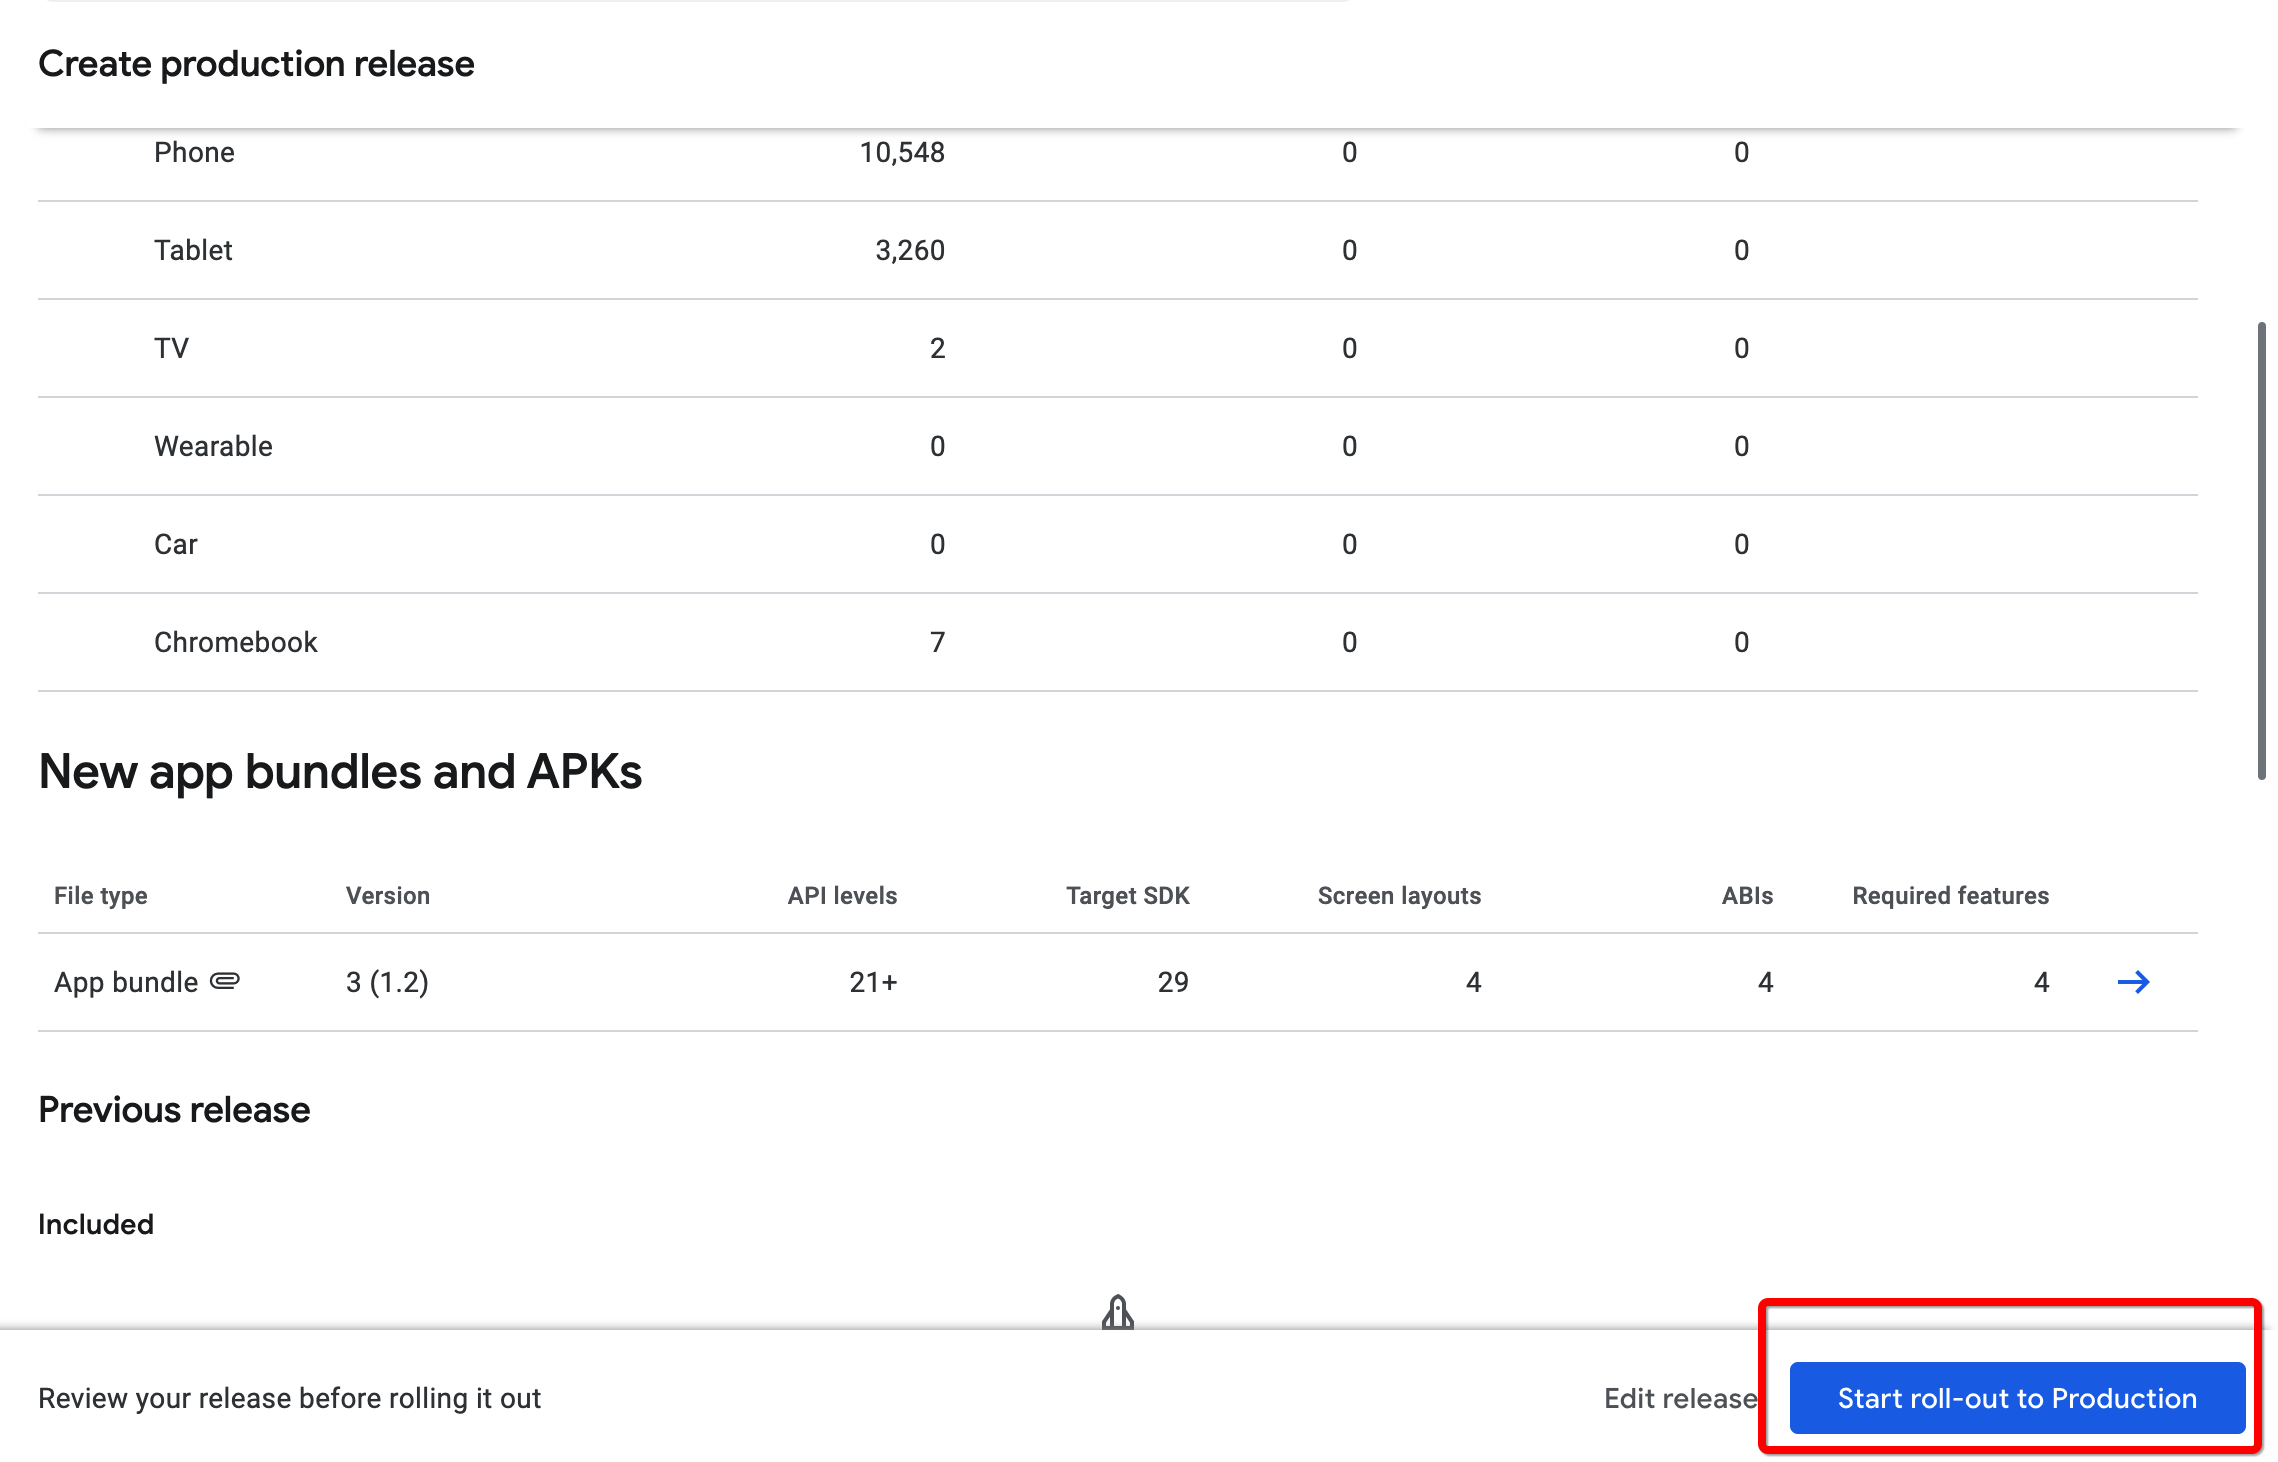
5. Start ROLL OUT PRODUCTION
6. Production > Releases
Creating Subscriptions in Playstore
To configure in-app subscriptions on the Google Play Console, you will need to follow these steps:
- Sign in to the Google Play Console.
- Click on the “In-app products” tab in the left-hand menu.
- Click on the “Create in-app product” button.
- Select “Subscription” as the product type.
- Enter the necessary details for your subscription, including the product ID, price, and billing period.
- Click on the “Save” button to create the subscription.
Once you have created the subscription, you can provide the product ID to us. You can find the product ID in the Google Play Console under the “In-app products” tab, next to the subscription you have created. It’s important to note that you will need to properly set up your in-app billing library and handle any necessary billing requests in your app in order to enable users to purchase subscriptions. You can refer to the Google Play Developer documentation for more information on setting up in-app billing in your app.