Here is the list of steps you need to do in AppStore before the release, steps to update the app, etc
Checklist
All the belows to be uploaded / added in SuperAdmin
- Create Provisioning Certificates
- Update Certificate password (Native integrations > Appstore)
- Update Profile (Native integrations > Appstore)
- Update Bundle ID (Native integrations > Appstore)
- Access of Appstore to Tech Email (Ask the team for the emailID)
- Download Firebase Plist and update (Native integrations > Appstore)
- Branch.io integration Details to update (Native integrations > Branch)
- Push Key needs to updated in firebase console
- App Icon (SuperAdmin > App Customisation)
- Splash image (SuperAdmin > App Customisation)
- Onboarding (SuperAdmin > App Customisation)
- Theme color (SuperAdmin > App Customisation)
Pre-requisite
- Decide whether you want as an individual licence or Organization
- Organization level licence provides more benefits in terms of access management (Especially creating provisioning certificates)
:::warning You must have a macOS running computer/laptop to complete the provisioning exercises. If you do not have, set up a call with us ::: Below are the steps to create provisioning certificates
Official Resources
or Read below steps from our developer’s contribution (You can contribute if we are missing anything)
- Creating Certificates https://help.apple.com/developer-account/#/deveedc0daa0
- Register app ID: https://help.apple.com/developer-account/#/dev1b35d6f83
- Create AppStore profile: https://help.apple.com/developer-account/#/devbd904d1a5
If you are an organization
- Invite Tradly email we have given to you with Admin or Developer Access
- If you do add as Developer access, you need to create the provisioning certificates (refer below steps)
- If you do add as admin access, we take care of creating provisioning certificates
Create App Identifier
You need to create APP identifier before creating a new app.
- Go to https://developer.apple.com
- Select ‘Account’
- Select ‘Certificates, Identifiers & Profiles’
- Select ‘Identifier’
- Click + Icon
- Select ‘App IDs’
- Select ‘App’
- Enter Description (you can put anything here for your reference)
- Select ‘Explicit’ for Bundle ID.
- Enter your app ID. Ex: com.tradly.app
- Please tick capabilities for the app. This might vary when we add more features to the product. For now, Please tick below -Associated Domains, Push Notifications.
- Click ‘Continue’
- Click ‘Register’
- This will generate your bundle ID.
Create a new app in Appstore connect
- Go to https://appstoreconnect.apple.com/apps
- Click + Icon
- Select ‘New App’
- Select ‘iOS’ as a platform
- Name - This is your app name
- Primary language for the app
- Select the bundle ID for the app.
- SKU - just enter bundle id itself
- Select ‘Full Access’ for the User Access
- Click ‘Create’
Creating Provisioning profile
- Go to https://developer.apple.com
- Select ‘Account’
- Select ‘Certificates, Identifiers & Profiles’
- Select ‘Profiles’
- Click + Icon
- Under Distribution > Select ‘Appstore’
- Click ‘Continue’
- Select the Bundle ID
- Select the certificate
- Enter profile name (Example: appname_distributionprofile)
- Click ‘Generate’
- Download this file and save ( .mobileprovision ) in your local system
You might need to upload in Superadmin for Tradly to generate build.
Creating Distribution Certificate
This involves 3 different additional steps.
- Create CSR
- Register Certificate
- Export Certificate
Create CSR
This is not done under Appstore interface. It’s done using your Mac System. If you are subscribing to our paid managed service, CSR will be created using Tradly Team’s Mac device.
- Open ‘Keychain Access App’ on your Mac
- Click ‘Keychain Access’ in the menu bar
- Open sub-menu under ‘Certificate Assistant’
- Click ‘Request a certificate from certificate authority’
- Enter your Apple ID email address and name
- Select the ‘Saved to Disk’ option
- Click ‘Continue’
- Save the file somewhere on your Mac ( .certSigningRequest )
Note: Keep this file in safer folder and for future use cases. CSR certificates are unique to the appstore account and you will create only once for all the apps insider your appstore account.
Register Certificate
- Go to https://developer.apple.com
- Select ‘Account’
- Select ‘Certificates, Identifiers & Profiles’
- Select ‘Certificates’
- Click the blue ’+’ Icon to create new certificates.
- Select ‘iOS Distribution’under Software
- Click ‘Continue’
- Upload the fil you downloaded in the previous step ( CSR file generated from Mac Device. Ask tradly team to generate CSR file if you don’t have MAC device.)
- Click ‘Continue’ to the next step
- Click ‘Download’
- Save this file somewhere on your Mac ( .cer )
Note: You need to send the previously generated (1. Registered certificate and 2. Mobile Provision file from PROFILES) to whoever who going to create the app bundle in Keychain & X-Code in Mac Device.
Export Certificate
In the MAC Device
- Double-click the file that downloaded in the previous step (Register certificate)
- This will open the Keychain Access app in the MAC Device
- Go to ‘My Certificates’
- Select the certificate you opened just now.
- Right-click that certificate
- Select the ‘Export …’ option
- Save the file with extension (.p21 = Personal Information Exchange (.p12)
- Password can be empty. To keep it secure, please enter your desired password and save/remember the password.
Creating Push Key
In the appstore Interface (URL : https://developer.apple.com/account/resources/certificates/list)
- Select ‘Keys’
- Click ’+’ Icon
- Enter ‘Key Name’ (Example: appname_pushkey )
- Tick ‘Apple Push Notification service’
- Click ‘Continue’
- Confirm ‘Register’
- Download and share that file to our team
Note:
- You cannot create more than two keys.
- You can use same keys for all the apps inside your organisation/individual appstore
OPTIONAL: if you lost your previously generated ‘P8’ key, You can also use the P12 file generated from the Mac Devices
Steps
- Go to Identifiers
- Under ‘Capabilities’, You would have already selected ‘Push Notifications’. Next to that you will find ‘Configure’ button.
- Select ‘Production SSL Certificate’ in the Popup
- Upload the CSR file which you previously downloaded (There is only one CSR file, so don’t get confused)
- Upload and it will generate a file
- Download it and send/use to the MAC Device Keychain
Key ID (Generating P8 File)
- Go to https://developer.apple.com
- Select ‘Account’
- Select ‘Certificates, Identifiers and Profiles’
- Select ‘Keys’
- Select the key you shared above
- You will see the Key ID there. Please share that ‘Key ID’.
Team ID
- Go to https://developer.apple.com
- Select ‘Account’ on Nav menu
- Select ‘Membership’ on Side Menu
- Please upload the ‘Team ID’ in Superadmin > Settings > Native Integrations > Appstore
Uploading Push Key Firebase Console
- Go to https://console.firebase.google.com/
- Select your firebase project
- On Top Left, Click ‘Settings’ Icon near Project Overview and then Click ‘Project Settings’
- Select ‘Cloud Messing’ on navbar
- Under iOS app configuration, Click ‘Upload Button’ under ‘APNs Authentication Key section’
- Upload push key (.p8) file generated on this section [https://tradly.app/docs/appstore#creating-push-key]
- Enter Key ID (https://tradly.app/docs/appstore#key-id )
- Enter Team ID (https://tradly.app/docs/appstore#team-id )
- Upload it If it is uploaded without any error, Push key for your project has been successfully configured.
Download Firebase Plist
- Go to https://console.firebase.google.com/
- Select your project (You might have only one project)
- On Top Left, Click ‘Settings’ Icon near Project Overview and then Click ‘Project Settings’
- Under General Tab, Go to ‘Your apps’ section
- Please select ‘iOS app’
- The click button named ‘GoogleService-Info.plist’
- It will download the Plist file into your system
- You have to upload this in super admin (Native integrations > Appstore ) Make sure you see a green labeled notification that it is saved successfully.
Appstore Management
- When the team has access to your Appstore, we will directly upload the app(IPA) to your Testflight
- You can test this app through Testflight apps on your iPhone to make sure everything is working properly before the release
FIRST Release
Once all is good with the testing, you can go ahead and set up a release.
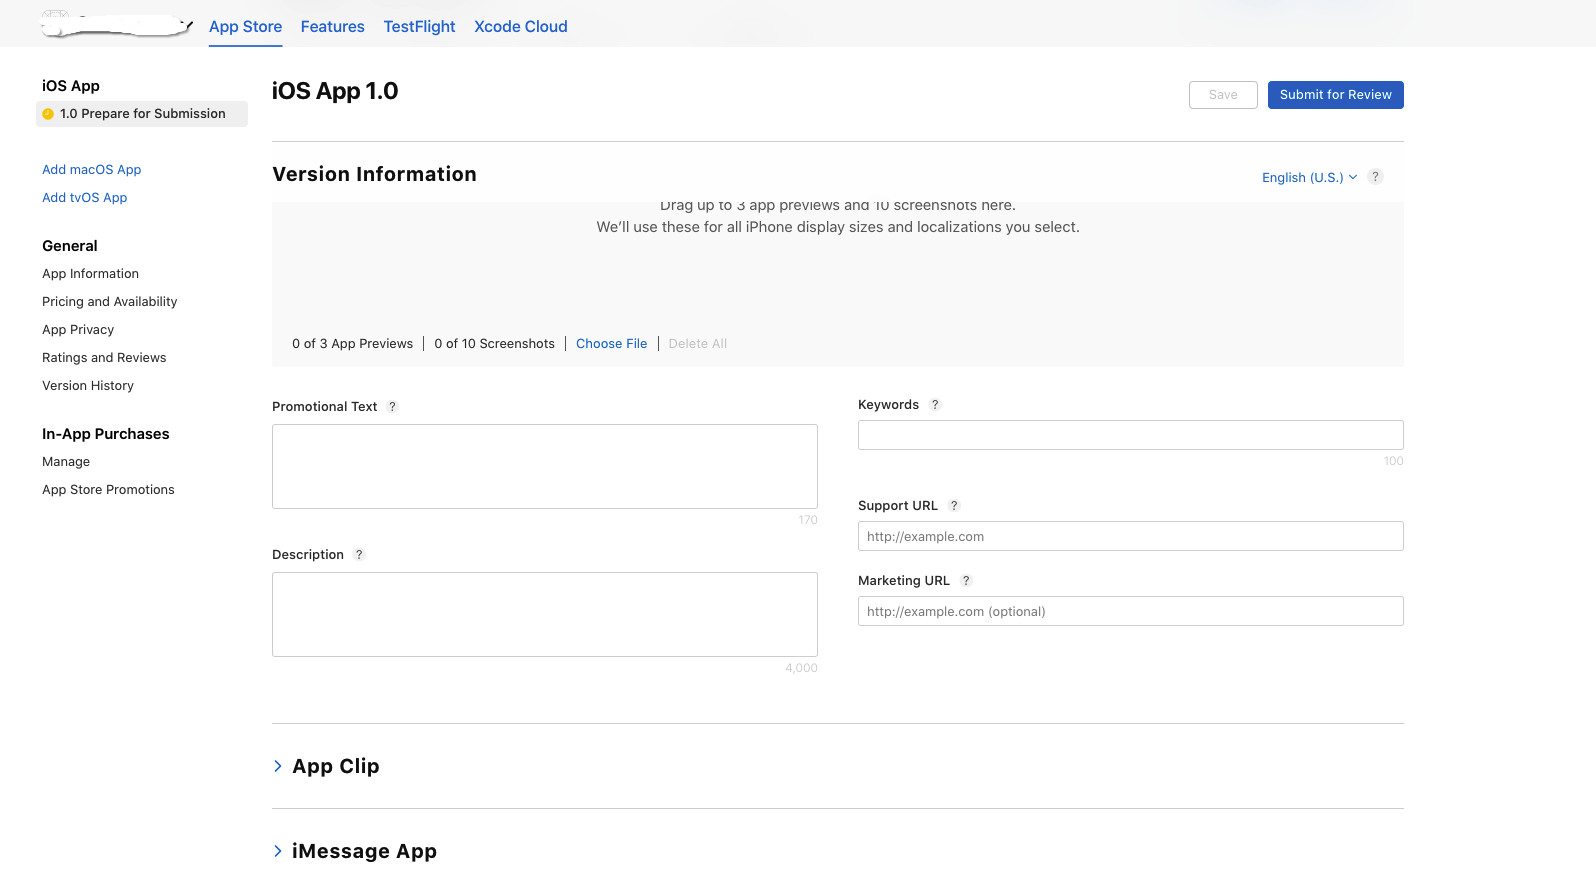
Create a new version :::warning Version Number The version number shown on the App Store and should match the one we used in Xcode. :::
Enter “What’s new in this version”
Update screenshots (You can take screenshots from the Testflight app )
Enter promotional text, descriptions, keywords, Support URL, Marketing URL
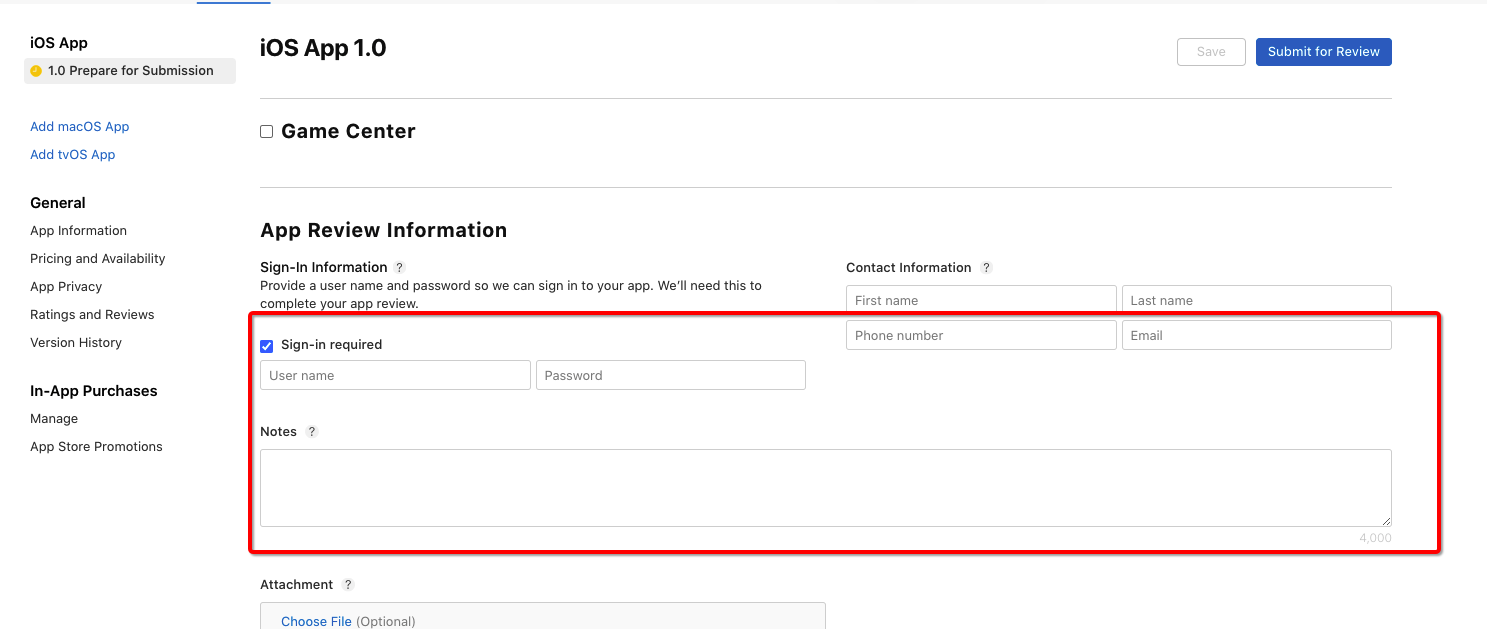
Add assets like App store icon, :::warning App Review Information Provide WORKING sign-in information for apple to sign in to your app and do the review. If you provide the wrong information, it will delay your app review. :::
Notes under App Review information. Below is an example of text what we provide to Apple to guide them on how they can use the app.
- Steps to experience the app
- You need an approved tenantID before login in to the app. Use “tradlysocial” case-sensitive on the first page.
- Use the login address above to follow a store, making a purchase with COD or adding listings, etc.
- Logout option available in the MORE section through nav bar
VIDEO GUIDE: https://drive.google.com/file/d/1AZMB1CNFGUsNi4n_GM62a93Xvk9QIpen/view?usp=sharing
App Review Management
Apple may review the app within a week. If you get approved, GREAT! If not, we will help you wherever you can. But remember you need to take care of this place by reading the messages you receive from them, reply properly. If any doubts on what to reply, ask us.
App Update
Similar to the app release, we will directly push the app to your Testflight. You can do the same process of testing, creating a release, and pushing the app to Appstore. Releasing UPDATE BUILD
- Go to https://appstoreconnect.apple.com/apps
- Select your app
- Create new version
- Enter your version
- Please fill ‘What’s new in the version’
- Scroll down and Go to ‘Build’ section
- Please select the latest build you have uploaded on last step (you can identify by version number and build number)
- Please select the Release options that you want. (Automatic or Manual) (you can release automatically when apple approved, you can manually release after apple approved) .
- Click ‘Save’
- Click ‘Submit for review’
IPA Upload to Appstore via transporter
- Uploading App to Appstore Connect via Transporter
- Download Transporter app from Appstore - https://apps.apple.com/us/app/transporter/id1450874784?mt=12
- Login using your Apple account
- Drag and drop the .ipa file delivered by us on Transporter app
- Click ‘Delivery’ Button
- It will take some to upload build to your App Store Connect
- Once build uploaded, and it will be available on TestFlight for testing
- Once testing done, you can create new release and upload build
Appstore In-App Subscription
To configure in-app subscriptions on the App Store, follow these steps:
- Log in to your App Store Connect account.
- Click on “My Apps” and select the app you want to configure subscriptions for.
- Click on the “Features” tab and then click on “In-App Purchases.”
- Click on the “Create New” button to create a new in-app subscription.
- Enter the details for your in-app subscription, including the product ID, pricing, and duration.
- Click on the “Create” button to save your changes.
It’s important to note that in-app subscriptions on the App Store have specific rules and guidelines that you must follow. Be sure to review these guidelines before configuring your subscriptions to ensure that your app complies with them.